Sender API
In this guide, we demonstrate how to enable off-ramps for users with the Sender API. The main difference between the Sender API and the Gateway contract is that users get a receiving address to pay for rather than connecting their non-custodial wallets. This means users can off-ramp directly from any wallet.
Getting Started
Firstly, we have to get the Client ID from your sender dashboard.
Visit your sender dashboard to retrieve your Client ID and Client Secret. If you're a new user, signup here as a "sender" and complete our Know-Your-Business (KYB) process. Your Client Secret should always be kept secret - we'll get to this later in the article.
Configure tokens
Head over to the settings page of your Sender Dashboard to configure the feePercent, feeAddress, and refundAddress across the tokens and blockchain networks you intend to use.
Interacting with an endpoint
Include your Client ID in the "API-Key" header of every request you make to Paycrest Offramp API.
const headers = {
  "API-Key": "208a4aef-1320-4222-82b4-e3bca8781b4b",
};
This is because requests without a valid API key will fail with status code 401: Unauthorized.
Initiating Orders for Users
Now, we've gotten all the neccessary details to allow us create the logic for initiating orders, we need to get our order params.
const orderParams = {
  amount: 100.00,
  token: "USDC",
  rate: 1500,
  network: "polygon",
  recipient: {
    institution: "GTBINGLA",
    accountIdentifier: "123456789",
    accountName: "John Doe",
    memo: "Payment from John Doe",
    providerId: ""
  },
  returnAddress: "0x123...",
  reference: "unique-reference",
}
P.S: We support USDT and USDC, but USDC is not supported on Tron and USDT is not supported on Base.
Here, we have the orderParams that contains all the necessary information about the order. One thing to note is that you'll need to get the rate and accountName in real time by calling their respective API endpoints. Also the returnAddress is just the user's address in the case of refunds.
// get the  nairaRate and verify account number
const nairaRate = "https://api.paycrest.io/v1/rates/usdt/1/ngn";
const accountName = "https://api.paycrest.io/v1/verify-account";


  const bankData = {
    institution: "KUDANGPC",
    accountIdentifier: "12323435"
  };

  try {
    const [nairaRate, accountName] = await Promise.all([
      fetch(nairaRate), // GET request
      fetch(accountName, {
        method: "POST",
        headers: { "Content-Type": "application/json" },
        body: JSON.stringify(bankData)
      }) // POST request
    ]);

    const getRate = await nairaRate.json();
    const getAccount = await accountName.json();

    console.log("naira rate response:", getRate.data);
    console.log("get account response:", getAccount.data);
  } catch (error) {
    console.error("Error fetching data:", error);
  }
const createOrder = "https://api.paycrest.io/v1/sender/orders";

  try {
    const response = await fetch(accountName, {
      method: "POST",
      headers: { "Content-Type": "application/json", "API-Key": "208a4aef-1320-4222-82b4-e3bca8781b4b" },
      body: JSON.stringify(orderParams)
    })

    const initiatedOrder = await response.json();

    console.log("Here's the initiated order details:", initiatedOrder);

  } catch (error) {
    console.error("Error fetching data:", error);
  }
A sample response would look exactly like this:
{
  "message": "Payment order initiated successfully",
  "status": "success",
  "data":
  {
    "id": "uuid-string",
    "amount": "100.00",
    "token": "USDT",
    "network": "polygon",
    "receiveAddress": "0x1234...",
    "validUntil": "2024-07-01T12:34:56Z",
    "senderFee": "0.50",
    "transactionFee": "0.10",
    "reference": "unique-reference"
  }
}
Listening to User Deposit
For an order to be complete, the user will have to fund the receiveAddress in the response. We do this using a webhook.
Webhook implementation on the Server
First, you'd need to set up your node server - including your Postgres DB and prisma as your ORM. If you're confused about how to get started with that, check out this article.
Next, create a Transaction schema on Prisma. This is what we'll use to update our DB with a user's new transaction. You can add more properties from the payload depending on your custom use case.
// schema.prisma
model Transaction {
  id        String
  createdAt DateTime  @default(now())
  status  String
}
Here, we have a webhook endpoint that first verifies the endpoint using the payload from paycrest that's sent to our webhook, "X-Paycrest-Signature" that's part of the expected payload header, and the Client Secret from the dashboard that we talked about earlier. If it passes verification, we save it to Transaction.
app.post("/webhook", async (req: any, res: any, next) => {
  const signature = req.get("X-Paycrest-Signature");
  if (!signature) return false;

  if (
    !verifyPaycrestSignature(req.body, signature, process.env.CLIENT_SECRET!)
  ) {
    return res.status(401).send("Invalid signature");
  }
  console.log("Webhook received:", req.body);
  try {
    const transaction = await prisma.transaction.create({
      data: {
        id: req.body.data.id,
        status: req.body.event,
      },
    });

    res.json({ data: transaction });
  } catch (err) {
    next(err);
  }
  res.status(200).send("Webhook received");
});

function verifyPaycrestSignature(
  requestBody: string,
  signatureHeader: string,
  secretKey: string
): boolean {
  const calculatedSignature = calculateHmacSignature(requestBody, secretKey);
  return signatureHeader === calculatedSignature;
}

function calculateHmacSignature(data: string, secretKey: string): string {
  const key = Buffer.from(secretKey);
  const hash = crypto.createHmac("sha256", key);
  hash.update(data);
  return hash.digest("hex");
}
Next, we create a new endpoint that our frontend will start polling immediately after transaction initiation. It checks the DB if any transaction with the corresponding id exists in our DB. If it does, it returns the status.
app.get("/transactions/:id", async (req: any, res: any, next) => {
  const { id } = req.params;
  const transaction = await prisma.transaction.findUnique({
    where: {
      id,
    },
  });

  res.json({ data: transaction ? transaction : 'Non-existent transaction' });
});
Your status can either be any of the following:
payment_order.pendingpayment_order.expiredpayment_order.settledpayment_order.refunded
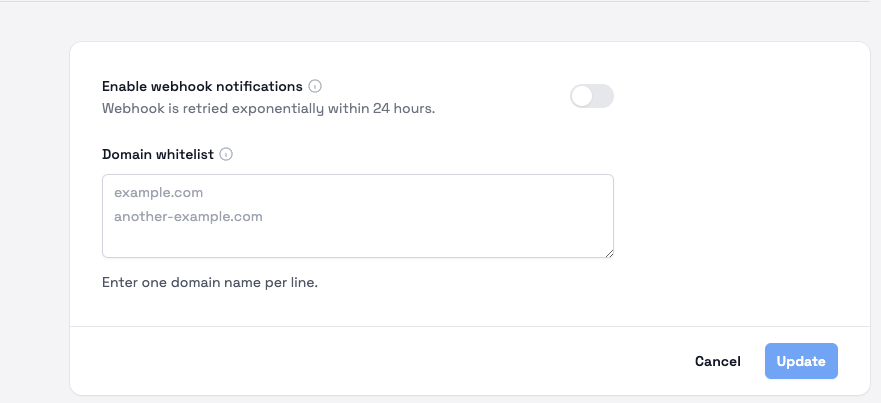
Once you deploy your server and get the endpoint, you can listen to payment order events by configuring the Webhook URL in your dashboard settings. We trigger various events based on the status of the payment order. Our webhook events are sent exponentially until 24 hours from when the first one is sent.

If pending, your frontend would have to continue pollling till it gets back a conclusive response - either expired, settled, or refunded.
P.S: This backend structure can be done in any custom way depending on your app as long as the webhook validates and stores the correct payload sent to it.